Introduction
In this Spring Boot Tutorial, you will get a brief understanding about working, Setup and advantages of Spring Boot Framework.
Spring Boot makes it easy to create stand-alone, production-grade Spring-based Applications that you can run. You can use Spring Boot to create Java applications that can be started by using java -jar or more traditional war deployments. We also provide a command line tool that runs “spring scripts”.
Primary Goals
- Provide a radically faster and widely accessible getting-started experience for all Spring development.
- Be opinionated out of the box but get out of the way quickly as requirements start to diverge from the defaults.
- Provide a range of non-functional features that are common to large classes of projects (such as embedded servers, security, metrics, health checks, and externalized configuration).
- Absolutely no code generation and no requirement for XML configuration.
We will go over some quick core configuration, Front end, data manipulation, Security, Exception handling, etc.
Advantages of Spring Boot
- Spring boot helps in resolving dependency conflict. It identifies required dependencies and imports them for you.
- It has information of compatible version for all dependencies. It minimizes the runtime classloader issues.
- It’s “opinionated defaults configuration” approach helps you in configuring most important pieces behind the scene. Override them only when you need. Otherwise, everything just works, perfectly. It helps in avoiding boilerplate code, annotations, and XML configurations.
- It provides embedded HTTP server Tomcat so that you can develop and test quickly.
- It has excellent integration with IDEs like eclipse and IntelliJ idea.
Setup
There are a couple of ways to start with the Spring Boot Project. Here, We will use Spring Initializr to generate the base Spring Project.
The generated project relies on the Spring boot parent.
<parent>
	<groupId>org.springframework.boot</groupId>
	<artifactId>spring-boot-starter-parent</artifactId>
	<version>2.1.7.RELEASE</version>
	<relativePath/> <!-- lookup parent from repository -->
</parent>
Spring Boot starters are templates that contain a collection of all the relevant transitive dependencies that are needed to start a particular functionality. For example, If you want to create a Spring WebMVC application then in a traditional setup, you would have included all required dependencies yourself. It leaves the chances of version conflict which ultimately result in more runtime exceptions.
Taking an example, to implement Spring Security in the Spring Boot application, all you need to import is spring-boot-starter-security dependency.
<dependency>
	<groupId>org.springframework.boot</groupId>
	<artifactId>spring-boot-starter-security</artifactId>
</dependency>
Now, Internally it will download all the transitive dependencies required for the Spring security and will add to your project. Notice that you do not need to provide version information into child dependencies. All versions are resolved in relation to the version of parent starter (in our example it’s 2.1.7.RELEASE).
<?xml version="1.0" encoding="UTF-8"?>
<project xmlns="http://maven.apache.org/POM/4.0.0" xmlns:xsi="http://www.w3.org/2001/XMLSchema-instance"
		 xsi:schemaLocation="http://maven.apache.org/POM/4.0.0 https://maven.apache.org/xsd/maven-4.0.0.xsd">
	<modelVersion>4.0.0</modelVersion>
	<parent>
		<groupId>org.springframework.boot</groupId>
		<artifactId>spring-boot-starter-parent</artifactId>
		<version>2.1.7.RELEASE</version>
		<relativePath/> <!-- lookup parent from repository -->
	</parent>
	<groupId>com.dailycodebuffer.examples</groupId>
	<artifactId>Spring-Boot-Tutorial</artifactId>
	<version>0.0.1-SNAPSHOT</version>
	<name>Spring-Boot-Tutorial</name>
	<description>Spring Boot Tutorial</description>

	<properties>
		<java.version>11</java.version>
	</properties>

	<dependencies>
		<dependency>
			<groupId>org.springframework.boot</groupId>
			<artifactId>spring-boot-starter-data-jpa</artifactId>
		</dependency>
		<dependency>
			<groupId>org.springframework.boot</groupId>
			<artifactId>spring-boot-starter-security</artifactId>
		</dependency>
		<dependency>
			<groupId>org.springframework.boot</groupId>
			<artifactId>spring-boot-starter-web</artifactId>
		</dependency>

		<dependency>
			<groupId>com.h2database</groupId>
			<artifactId>h2</artifactId>
			<scope>runtime</scope>
		</dependency>
		<dependency>
			<groupId>org.springframework.boot</groupId>
			<artifactId>spring-boot-starter-test</artifactId>
			<scope>test</scope>
		</dependency>
		<dependency>
			<groupId>org.springframework.security</groupId>
			<artifactId>spring-security-test</artifactId>
			<scope>test</scope>
		</dependency>

		<dependency>
			<groupId>org.springframework.boot</groupId>
			<artifactId>spring-boot-starter-thymeleaf</artifactId>
		</dependency>

	</dependencies>

	<build>
		<plugins>
			<plugin>
				<groupId>org.springframework.boot</groupId>
				<artifactId>spring-boot-maven-plugin</artifactId>
			</plugin>
		</plugins>
	</build>

</project>
Spring Boot Application Configuration
We’ll configure the main class of the Spring Boot Application.
@SpringBootApplication
public class SpringBootTutorialApplication {

	public static void main(String[] args)
	{
		SpringApplication.run(SpringBootTutorialApplication.class, args);
	}

}
Notice that, we have annotated the main class of the application with @SpringBootApplication annotation. Under the hood, it’s equivalent to @Configuration, @EnableAutoConfiguration, and @ComponentScan together. Check out the @SpringBootApplication source code.
@Target({ElementType.TYPE})
@Retention(RetentionPolicy.RUNTIME)
@Documented
@Inherited
@SpringBootConfiguration
@EnableAutoConfiguration
@ComponentScan(
    excludeFilters = {@Filter(
    type = FilterType.CUSTOM,
    classes = {TypeExcludeFilter.class}
), @Filter(
    type = FilterType.CUSTOM,
    classes = {AutoConfigurationExcludeFilter.class}
)}
)
public @interface SpringBootApplication {
    // abstrsct source code
}
Now, let’s define the Spring application properties file. To change the Server Port number and Name of the application, define the below properties in Application.properties file.
### Spring Application Name #########
spring.application.name=Spring Boot Tutorial

### Server port #########
server.port=8081
The above code will set the Spring application name to “Spring Boot Tutorial” and change the port number to 8081. Note: Default port for the application is 8080. There are of course many more Spring Boot properties available.
To execute the application, you can run the main() method from IDE such eclipse, or you can build the jar file and execute from the command prompt.
If using maven for Spring Boot Project, use the below command to run the application.
mvn spring-boot:run
Embedded Server
Spring boot applications always include tomcat as embedded server dependency. It means you can run the Spring boot applications from the command prompt without needling complex server infrastructure.
You can exclude tomcat and include any other embedded server if you want. Or you can make exclude server environment altogether. It’s all configuration based.
For example, the below configuration exclude tomcat and include jetty as an embedded server.
<dependency>
    <groupId>org.springframework.boot</groupId>
    <artifactId>spring-boot-starter-web</artifactId>
    <exclusions>
        <exclusion>
            <groupId>org.springframework.boot</groupId>
            <artifactId>spring-boot-starter-tomcat</artifactId>
        </exclusion>
    </exclusions>
</dependency>

<dependency>
    <groupId>org.springframework.boot</groupId>
    <artifactId>spring-boot-starter-jetty</artifactId>
</dependency>
Basic MVC View
Let’s add a simple front end view to the application using Thymeleaf.
First, we need to add the spring-boot-starter-thymeleaf dependency to our pom.xml:
<dependency>
    <groupId>org.springframework.boot</groupId>
    <artifactId>spring-boot-starter-thymeleaf</artifactId>
</dependency>
This will enable Thyeleaf by default – no extra configuration required. We can now configure our Application.properties.
spring.thymeleaf.cache=false
spring.thymeleaf.enabled=true
spring.thymeleaf.prefix=classpath:/templates/
spring.thymeleaf.suffix=.html
Once this is set, Now we can define a Simple Controller and basic Home page which ca Show Welcome message.
@Controller
public class HomeController {

    @Value("${spring.application.name}")
    String appName;

    @GetMapping("/")
    public String homePage (Model model)
    {
        model.addAttribute("appName", appName);
        return "homePage";
    }
}
Note: We have used the property spring.application.name which will be injected and passing it through the MOdel attributes, which in fact will be used in front end view
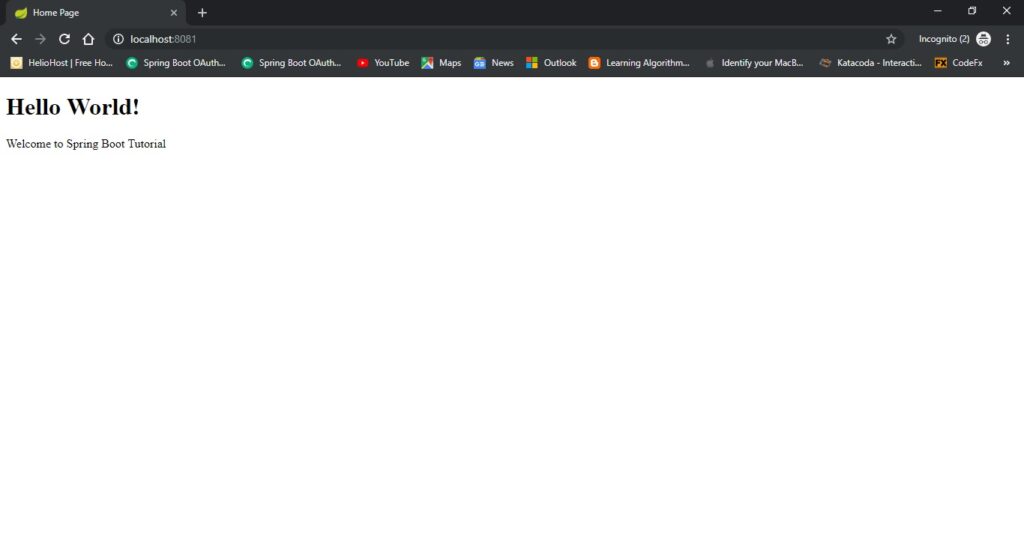
Now, this is our homePage.html,
<!DOCTYPE html>
<html lang="en">
<head>
    <meta charset="UTF-8">
    <title>Home Page</title>
</head>
<body>
    <h1>Hello World!</h1>
    <p>Welcome to <span th:text="${appName}">Our App</span></p>
</body>
</html>
Now, when you run build and run the application, the output would be generated.
Security
For adding spring security to the Spring Boot application, you need to include Spring boot Security Starter dependency
<dependency>
    <groupId>org.springframework.boot</groupId>
    <artifactId>spring-boot-starter-security</artifactId>
</dependency>
Once the spring-boot-starter-security dependency on the classpath of the application – all endpoints are secured by default, using either httpBasic or formLogin based on Spring Security’s content-negotiation strategy.
If we have the spring-bott-security-starter on the classpath, we should usually define our own custom security configuration by extending WebSecurityConfigurerAdapter class:
@Configurable
@EnableWebSecurity
public class SecurityConfig extends WebSecurityConfigurerAdapter {

    protected  void configure(HttpSecurity httpSecurity) throws Exception
    {
        httpSecurity.authorizeRequests()
                .anyRequest()
                .permitAll()
                .and()
                .csrf()
                .disable();
    }
}
This will allow unrestricted access to all endpoints.
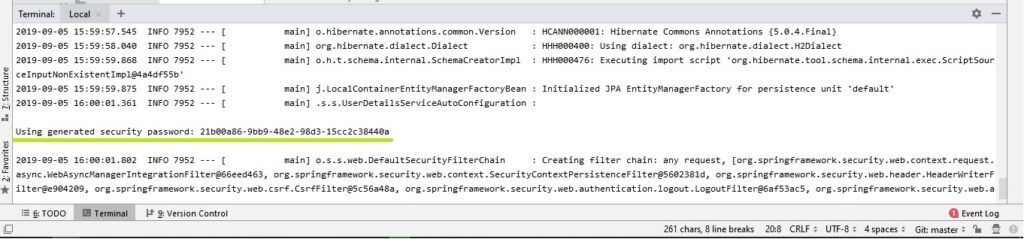
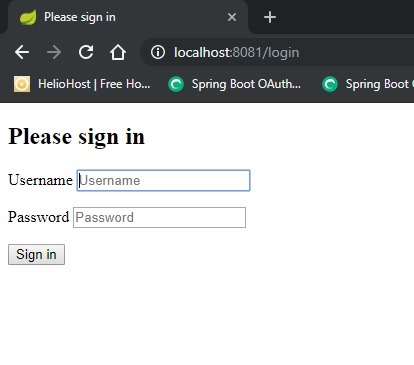
If custom security configuration is not defined in the application, then by default it will show the Login form at the startup of the application. It will ask to enter username and Password generated by Spring Security.
The default username is “user” and password will be generated while starting the Spring Boot application and will be printed in application logs.
Simple Persistence
Let’s start by defining the entity – Employee entity class.
@Entity
public class Employee {

    @Id
    @GeneratedValue(strategy = GenerationType.AUTO)
    private long id;

    @Column(nullable = false)
    private String name;

    @Column(nullable = false, unique = true)
    private String emailId;

    public long getId() {
        return id;
    }

    public void setId(long id) {
        this.id = id;
    }

    public String getName() {
        return name;
    }

    public void setName(String name) {
        this.name = name;
    }

    public String getEmailId() {
        return emailId;
    }

    public void setEmailId(String emailId) {
        this.emailId = emailId;
    }
}
And its Repository, making good use of Spring Data JPA :
public interface EmployeeRepository  extends JpaRepository<Employee, Long> {

    List<Employee> findByEmailId(String emailId);
}
Now, you need to define the Spring Boot application to scan for the Entity classes and Repository classes. We are using
- @EnableJpaRepositories to scan the specified package for repositories
- @EntityScan to pick up our JPA entities
@EnableJpaRepositories("com.dailycodebuffer.examples.SpringBootTutorial.repository")
@EntityScan("com.dailycodebuffer.examples.SpringBootTutorial.entity")
@SpringBootApplication
public class SpringBootTutorialApplication {
    ...
    ...
}
To keep things simple, we’re using an H2 in-memory database here – so that we don’t have any external dependencies when we run the project.
Once we include H2 dependency, Spring Boot auto-detects it and sets up our persistence with no need for extra configuration, other than the data source properties:
spring.datasource.driver-class-name=org.h2.Driver
spring.datasource.url=jdbc:h2:mem:bootapp;DB_CLOSE_DELAY=-1
spring.datasource.username=sa
spring.datasource.password=
Controller
We’ll define a simple CRUD application with Employee resources and simple validation. Now to configure simple Web tier, we’ll set up a Simple Controller – EmployeeController
@RestController
@RequestMapping("api/employee")
public class EmployeeController {

    @Autowired
    private EmployeeRepository employeeRepository;

    @PostMapping
    @ResponseStatus(HttpStatus.CREATED)
    public Employee create(Employee employee)
    {
        return employeeRepository.save(employee);
    }

    @DeleteMapping("/{id}")
    public void delete(@PathVariable long id)
    {
        employeeRepository.findById(id)
                .orElseThrow(EmployeeNotFoundException::new);
        employeeRepository.deleteById(id);
    }

    @PutMapping("/{id}")
    public Employee updateBook(@RequestBody Employee employee, @PathVariable Long id) {
        if (employee.getId() != id) {
            throw new EmployeeIdMismatchException();
        }
        employeeRepository.findById(id)
                .orElseThrow(EmployeeNotFoundException::new);
        return employeeRepository.save(employee);
    }


    @GetMapping("/{id}")
    public Employee find(@PathVariable Long id) {
        return employeeRepository.findById(id)
                .orElseThrow(EmployeeNotFoundException::new);
    }

    @GetMapping
    public Iterable findAll() {
        return employeeRepository.findAll();
    }


    @GetMapping("/email/{emailId}")
    public List findByTitle(@PathVariable String emailId) {
        return employeeRepository.findByEmailId(emailId);
    }

}
Given this aspect of the application is an API, we made use of the @RestController annotation here – which equivalent to a @Controller along with @ResponseBody – so that each method marshalls the returned resource right to the HTTP response.
Conclusion
Here, We identified and walk through the basic concepts of Spring Boot framework. We learned the concepts in brief and done code walkthrough in simple basic terms. We urge you to go through the concepts in detail for better understanding.
As always, check out the tutorial code from GitHub


Pingback: Custom Banners in Spring Boot - Daily Code Buffer