In this article, we will cover the famous Spring Boot Whitelabel error page. We are covering how to disable the default error page and how we can customize the Whitelabel error page in your Spring Boot application.
1. Introduction
Spring Boot uses a default Whitelabel error page in case of a server error. This is not very helpful and we may want to give more relevant information to the customer in a production environment. This article focuses on the Spring Boot whitelabel error page. We will learn how to disable this default behavior and how we can use our own custom error page to align with our UI.
2. Disabling Whitelabel Error Page
There are multiple ways to disable this behavior in your Spring Boot application. Let’s cover common options to do this.
2.1 Using Properties File.
Spring Boot provides an application.properties (or YAML) file to easily configure/change your application. We can use the same property file to disable this error page globally. Set server.error.whitelabel.enabled to false to achieve this.
# Whether to enable the default error page displayed in browsers in case of a server error.

server.error.whitelabel.enabled=false
Adding this entry to the application.properties file will disable the error page and show a concise page that originates from the underlying application container, e.g., Tomcat.
We can achieve the same result by excluding the ErrorMvcAutoConfiguration bean. We can do this by either adding this entry to the properties file:
#for Spring Boot 1.x
spring.autoconfigure.exclude=org.springframework.boot.autoconfigure.web.ErrorMvcAutoConfiguration

#for Spring Boot 2.0
#spring.autoconfigure.exclude=org.springframework.boot.autoconfigure.web.servlet.error.ErrorMvcAutoConfiguration
For both the different versions, there is a different class to be excluded. As we are using Spring Boot 2.x in this tutorial, we are considering the second line for the change.
2.2 Exclude using @EnableAutoConfiguration
In case you like to exclude using the code, you have the option to pass the exclude configuration list to the @EnableAutoConfiguration annotation.
@SpringBootApplication
@EnableAutoConfiguration(exclude = {
 ErrorMvcAutoConfiguration.class
})
public class SpringBootApplication {
    //application code
}
All the methods mentioned above will disable the white label error page. That leaves us with the question of who then actually handles the error?
Well, as mentioned above, it’s usually the underlying application container. The good thing is we can further customize things by showing our custom error pages instead of all the defaults – this is the focus of the next section.
3. Displaying Custom Error Pages
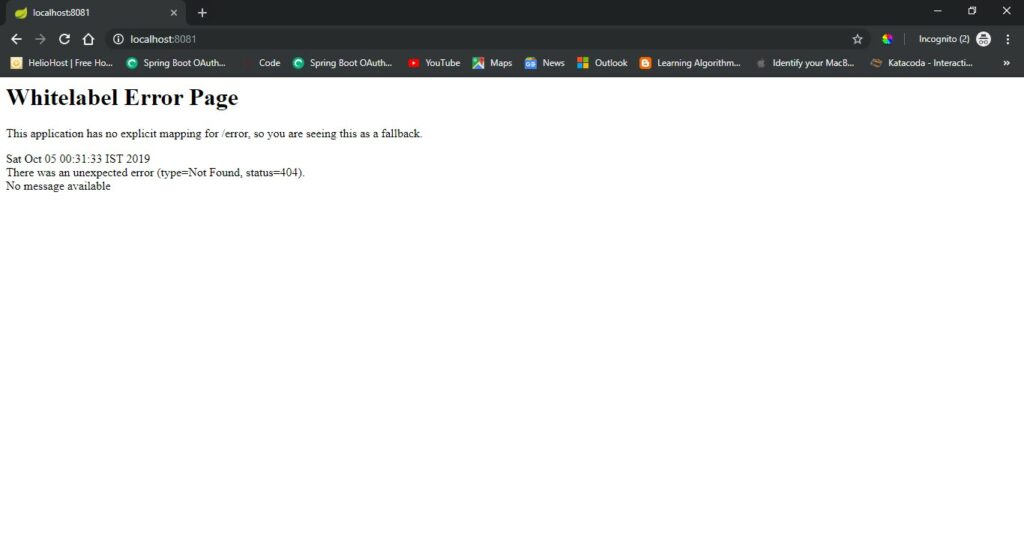
As suggested, one of the first options is to Overriding the error page with your own template. For this post, we are taking Thymeleaf as our underlying templating engine. We create a custom error page with a name error.html and save it under resources/templates directory. In case of error, the Spring Boot system will automatically pick this custom error page. Let’s see how the page looks like before customizing the error page.
Let’s create our custom error.html and place it under the resources/templates directory.
<!DOCTYPE html>
<html>
<body>
<h1>Something went wrong! </h1>
<h2>We are looking into it!</h2>
<a href="/">Go Home</a>
</body>
</html>
If we run our application, it’ll automatically be picked up by the default Spring Boot’s BasicErrorController.
This is all we need to display our custom error page. With some styling, we’ll now have a much nicer looking error page for our users:
3.1. Custom ErrorController
The limitation so far is that we can’t run custom logic when errors occur. To achieve that, we have to create an error controller bean that’ll replace the default one.
For this, we have to create a class that implements the ErrorController interface and overrides its getErrorPath() to return a custom path to call when an error occurred:
@Controller
public class CustomErrorController implements ErrorController {

    private static final String PATH = "/error";

    @RequestMapping(value = PATH)
    public String error() {
        return "customError";
    }

    @Override
    public String getErrorPath() {
        return PATH;
    }

}
Let’s have a look at the above code.
- Our controller creates a mapping for the path as returned by
getErrorPath()method. - ErrorController interface shows that a
@Controlleris used to render errors. - We have the option to use
getErrorPath()to return different error pages based on the error type.
Let’s create a new error page which we will use in this new controller method.
<!DOCTYPE html>
<html>
<body>
<h1>Something went wrong!  This is a Custom Error Page</h1>
<h2>We are looking into it!</h2>
<a href="/">Go Home</a>
</body>
</html>
When we run our application this time, we will have a different error page (newly created) displayed to the customer.
Conclusion
In this post, we cover how to disable Spring Boot Whitelabel error page and how we can customize the Whitelabel error page in your Spring Boot application. We learned how to extend the error handling mechanism by implementing ErrorController in the custom error handling controller.
Github Repository
As always, Please find the code in Github: Click Here