In this quick post, we will learn about building a Spring Boot application using IntelliJ. The main purpose of this post is to help anyone new to Spring Boot get rolling quickly writing Spring applications with Spring Boot in IntelliJ. If you are a beginner with Spring Boot, I highly recommend starting with our Spring Boot.
1. Overview
IntelliJ IDEA is the most popular Java IDE. IntelliJ IDEA provides first-class support to create and run Spring Boot based applications. We can create and configure the Spring Boot application in the following ways.
- Import Spring Boot project in IntelliJ IDEA.
- Use built-in support for Spring Initializr in the IntelliJ IDEA editor.
We are using the built-in support of the IDE to create our Spring Boot application.
You can download IntelliJ IDEA from here.
Spring Boot is available in the Ultimate edition only.
But hey! Don’t worry. You can also use the community edition of IntelliJ IDEA and Spring Initializr for Spring Boot Projects. Click here to check that article.
2. Create a Spring Boot Project with IntelliJ
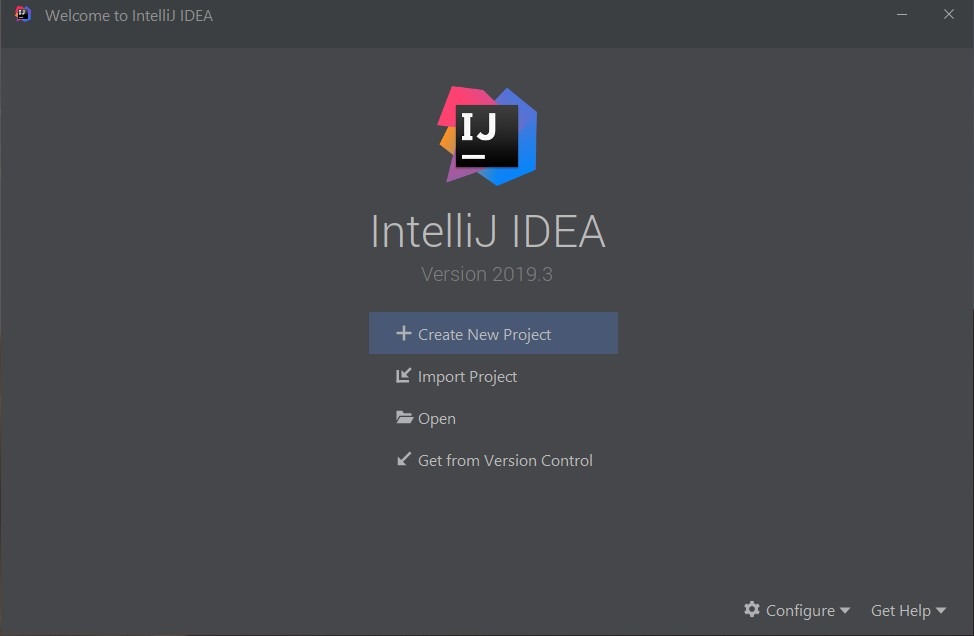
To start, the process, open IntelliJ IDEA and click on the new project option.
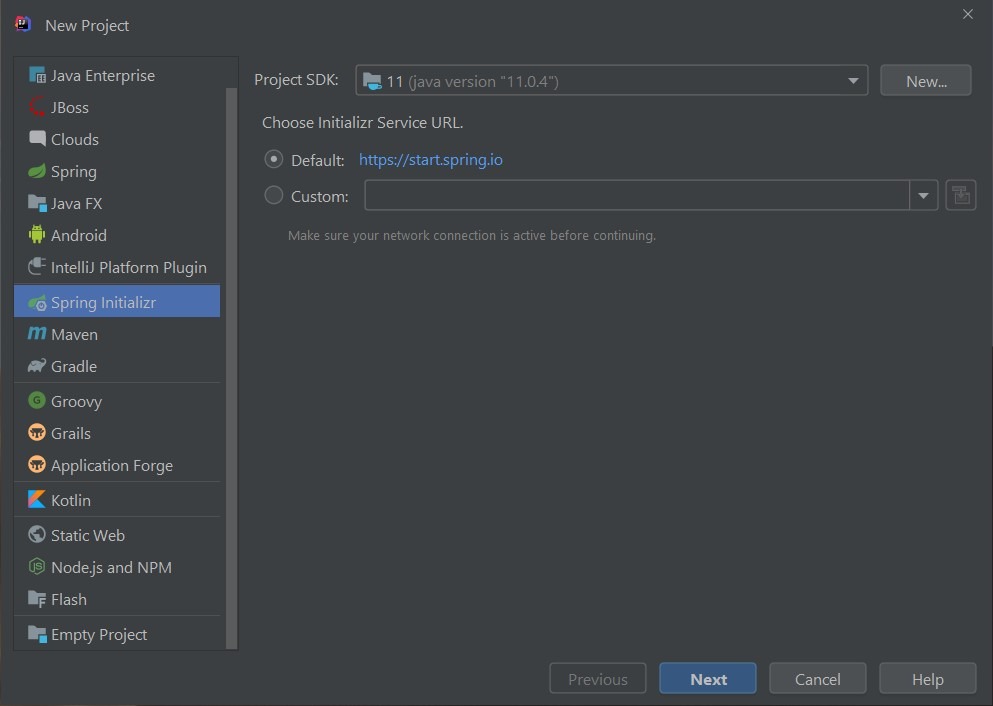
3. Select Spring Initializr from the project type on the left side panel. Select the correct JDK from the Project SDK drop-down (Spring Boot 2.x require a minimum JDK 8).
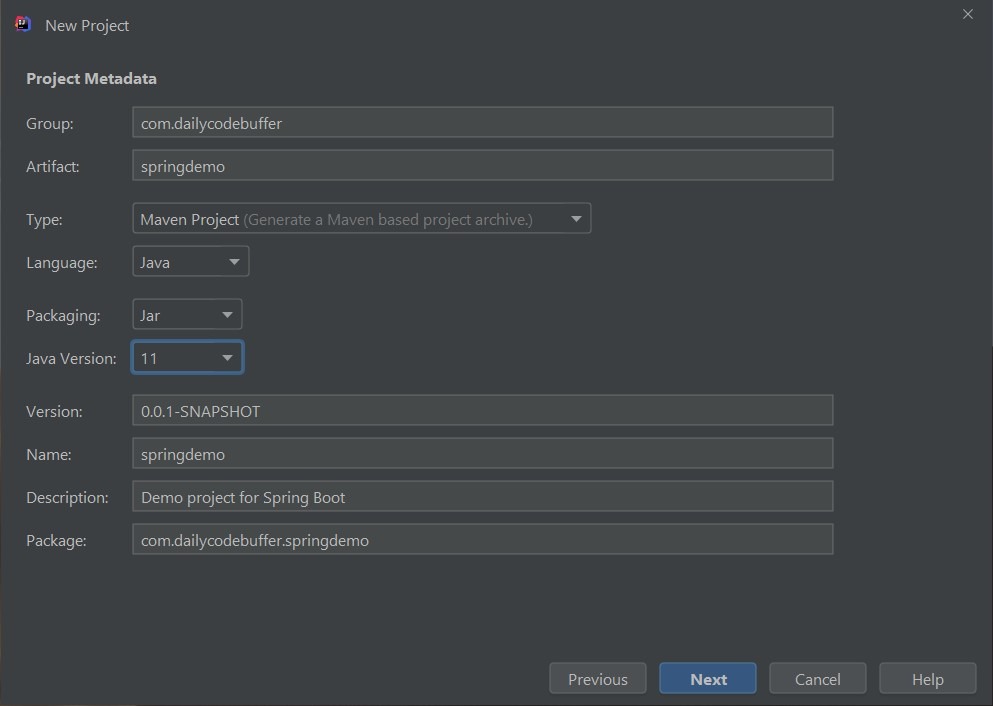
4. Enter the Maven project properties as per your project requirements and click on the next step.
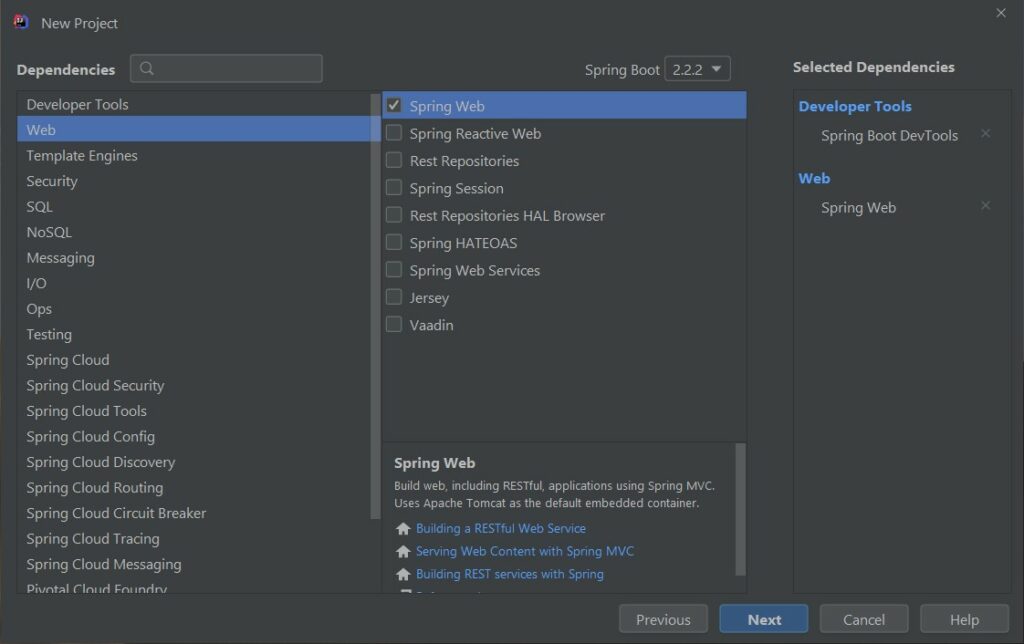
5. Select the Spring Boot version and other required dependencies for your project. Based on the selected dependencies, it will add correct Spring Boot Starters in the pom.xml file.
6. In the last part of the wizard, we need to select a project name and project location. Once selected click on the “Finish” button.
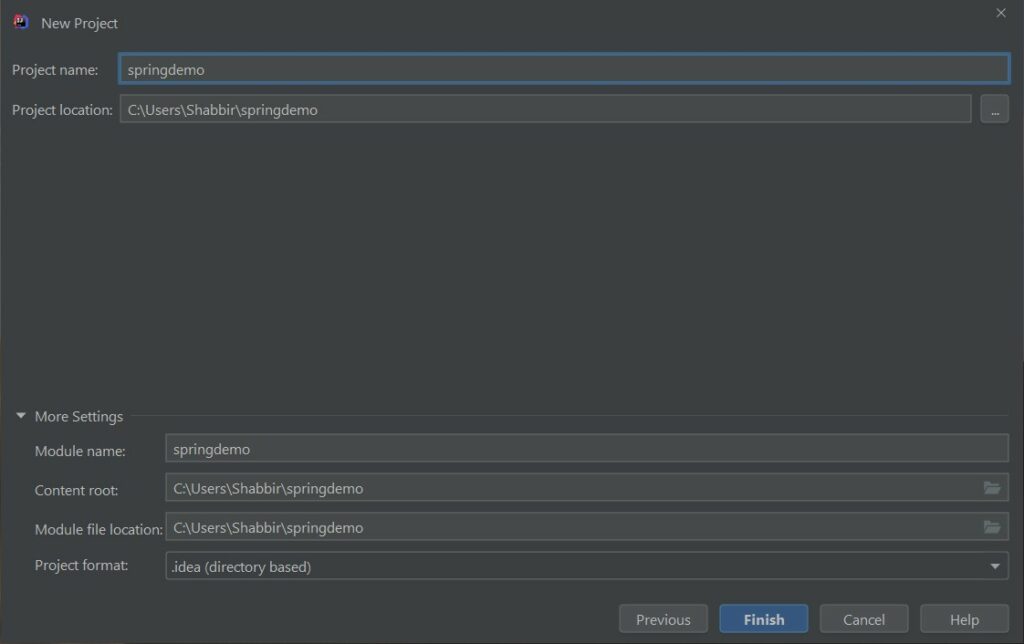
Once finished, IntelliJ IDEA import all the required dependencies and open the newly created a project to work on.
7. The pom.xml file
The pom.xml file contains all the building blocks for the Spring Boot application. Open the pom.xml file in the project’s root module.
<?xml version="1.0" encoding="UTF-8"?>
<project xmlns="http://maven.apache.org/POM/4.0.0" xmlns:xsi="http://www.w3.org/2001/XMLSchema-instance"
         xsi:schemaLocation="http://maven.apache.org/POM/4.0.0 https://maven.apache.org/xsd/maven-4.0.0.xsd">
    <modelVersion>4.0.0</modelVersion>
    <parent>
        <groupId>org.springframework.boot</groupId>
        <artifactId>spring-boot-starter-parent</artifactId>
        <version>2.2.2.RELEASE</version>
        <relativePath/> <!-- lookup parent from repository -->
    </parent>
    <groupId>com.dailycodebuffer</groupId>
    <artifactId>springdemo</artifactId>
    <version>0.0.1-SNAPSHOT</version>
    <name>springdemo</name>
    <description>Demo project for Spring Boot</description>

    <properties>
        <java.version>11</java.version>
    </properties>

    <dependencies>
        <dependency>
            <groupId>org.springframework.boot</groupId>
            <artifactId>spring-boot-starter-web</artifactId>
        </dependency>

        <dependency>
            <groupId>org.springframework.boot</groupId>
            <artifactId>spring-boot-devtools</artifactId>
            <scope>runtime</scope>
            <optional>true</optional>
        </dependency>
        <dependency>
            <groupId>org.springframework.boot</groupId>
            <artifactId>spring-boot-starter-test</artifactId>
            <scope>test</scope>
            <exclusions>
                <exclusion>
                    <groupId>org.junit.vintage</groupId>
                    <artifactId>junit-vintage-engine</artifactId>
                </exclusion>
            </exclusions>
        </dependency>
    </dependencies>

    <build>
        <plugins>
            <plugin>
                <groupId>org.springframework.boot</groupId>
                <artifactId>spring-boot-maven-plugin</artifactId>
            </plugin>
        </plugins>
    </build>

</project>
We added spring-boot-starter-parent as the parent of our Spring Boot project. This parent provides several features in the Spring Boot application
- Configuration – Java Version and Other Properties.
- Dependency Management – Version of dependencies
- Default Plugin Configuration
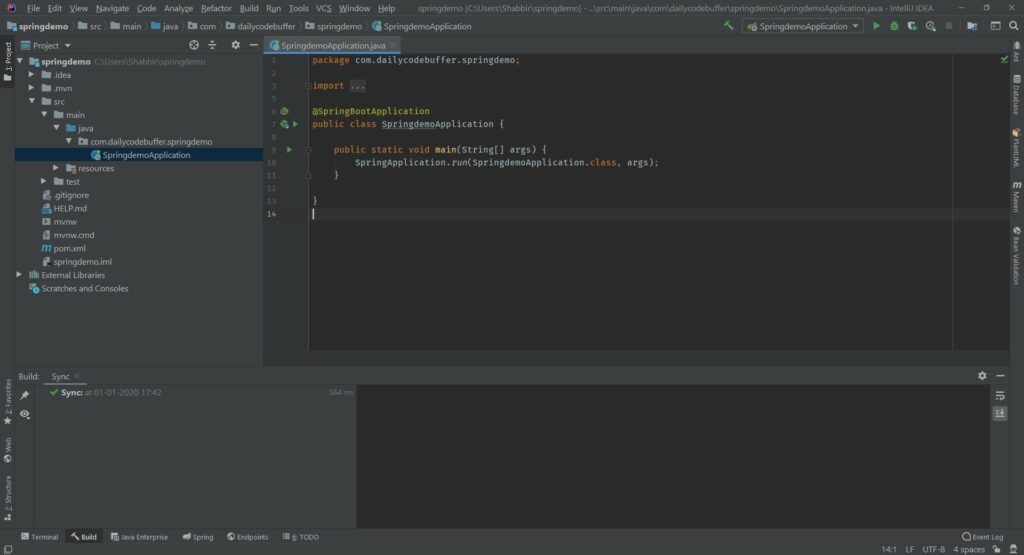
8. Spring Boot Main Application Class
When we created this project, Spring Initializr created the following class automatically to start our Spring Boot application.
package com.dailycodebuffer.springdemo;

import org.springframework.boot.SpringApplication;
import org.springframework.boot.autoconfigure.SpringBootApplication;

@SpringBootApplication
public class SpringdemoApplication {

    public static void main(String[] args) {
        SpringApplication.run(SpringdemoApplication.class, args);
    }

}
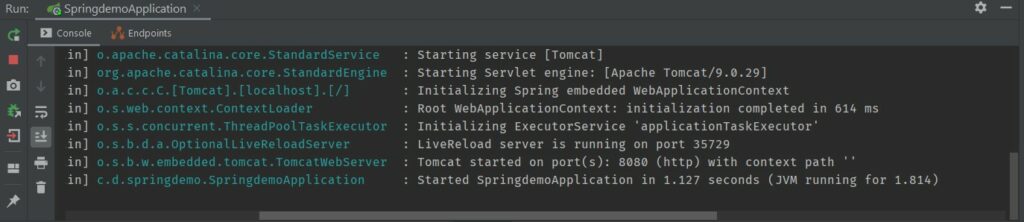
9. Run Application
Spring Boot’s main class contains the main method. This is just a standard method that follows the Java convention for an application entry point. Our main method delegates to Spring Boot’s SpringApplication class by calling run. SpringApplication bootstraps our application, starting Spring. We can run our application from the IntelliJ by clicking on the run application icon
10. Conclusion
In this small post, we covered building a Spring Boot application using IntelliJ. IntelliJ is really a powerful editor and provides first-class support to create and run Spring Boot based web applications.
Watch this video to follow along to start with this tutorial