Overview
Uploading files to a website isn’t an uncommon task, but it also isn’t very straightforward to achieve. Some use-cases for why you’d want to upload a file to a website includes services that offer online file conversions and photo sharing websites. In certain applications, we might even want to send a file to another user, etc.
Spring provides a MultipartFile interface to handle HTTP multi-part requests for uploading files. Multipart-file requests break large files into smaller chunks which makes it efficient for file uploads. More information about it can be found here.
Project Setup
To demonstrate file uploading, we’ll be building a typical Spring MVC application which consists of a Controller, a Service for backend processing, and Thymeleaf for view rendering.
The simplest way to start with a skeleton Spring Boot project, as always, is using Spring Initializr. Select your preferred version of Spring Boot and add the Web and Thymeleaf dependencies:
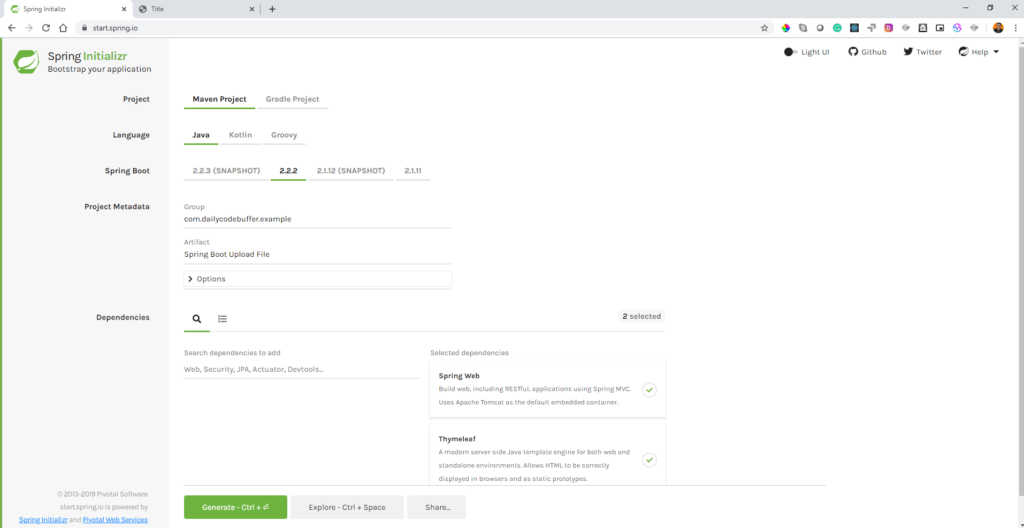
After this, generate it as a Maven project and you’re all set!
Building the Application
Service Class
Let’s start by building the Service layer first. We will name it as FileService.java:
@Service
public class FileService {

    @Value("${app.upload.dir:${user.home}}")
    public String uploadDir;

    public void uploadFile(MultipartFile file)
    {
        try {
            Path copyLocation = Paths.get(uploadDir + File.separator + StringUtils.cleanPath(file.getOriginalFilename()));
            Files.copy(file.getInputStream(),copyLocation, StandardCopyOption.REPLACE_EXISTING);

        } catch (IOException e) {
            e.printStackTrace();
            throw new FileStorageException("File Not Found");
        }
    }
}
Let’s break it down line by line:
@Serviceis a specialization of the@Componentannotation. It tells Spring that this is a service class. Typically all the business logic is written in this layer.- We then have a variable
uploadDir, which we will be using to store the path of the directory we want our file to be uploaded to. It is annotated with@Value, which means its value can be set by theapplication.propertiesfile by theapp.upload.dirkey. In case this key is not defined, the default value isuser.home– which is there in an environment variable of every OS. - Then we have a public method
uploadFilewhich takes in aMultipartFileas an argument. - We then created the full
Pathof the file by using thePathsclass provided by Java.StringUtils.cleanPathis used to clean the path and we simply appenduploadDirto it using aFile.separator. Always use utility methods to handle paths in code because it will automatically handle different OS implementations. For example, in Windows, the file separator is\while in Linux it’s/. - Then we copy the file to the location using
Files.copy. TheREPLACE_EXISTINGcopy option will override any file with the same name there. - If there is an
Exceptionin this whole process, we captured it and threw a customFileStorageExceptionexception.
Custom Exception
We wrote a custom FileStorageException for any exception during the file upload process. It’s a simple class that extends RuntimeException:
public class FileStorageException extends RuntimeException {

    private String msg;

    public FileStorageException(String msg) {
        this.msg = msg;
    }

    public String getMsg() {
        return msg;
    }

    public void setMsg(String msg) {
        this.msg = msg;
    }
}
To be able to use the exception in the way that we did, Spring needs to know how to deal with it if it’s encountered. For that, we’ve created an AppExceptionHandler which is annotated with @ControllerAdvice and has an @ExceptionHandler defined for FileStorageException:
@ControllerAdvice
public class CustomExceptionHandler {

    @ExceptionHandler(FileStorageException.class)
    public ModelAndView handleException(FileStorageException exception, RedirectAttributes redirectAttributes)
    {
        ModelAndView mv = new ModelAndView();
        mv.addObject("message",exception.getMsg());
        mv.setViewName("error");
        return mv;
    }
}
In the handleException method we simply returned the ModelAndView object that will return the error message set in a view of error, which is just a Thymeleaf template named error.html:
<!DOCTYPE html>
<html lang="en" xmlns:th="http://www.thymeleaf.org">
<head>
    <meta charset="UTF-8">
    <title>ERROR</title>
</head>
<body>
    <h1>Error!!!</h1>
    <div th:if="${message}">
        <h2 th:text="${message}"/>
    </div>
</body>
</html>
Controller and Frontend
Let’s now create a simple FileController class that will use the FileService to handle file uploading:
@Controller
public class FileController {

    @Autowired
    FileService fileService;

    @GetMapping("/")
    public String index() {
        return "upload";
    }

    @PostMapping("/uploadFile")
    public String uploadFile(@RequestParam("file") MultipartFile file, RedirectAttributes redirectAttributes) {

        fileService.uploadFile(file);

        redirectAttributes.addFlashAttribute("message",
            "You successfully uploaded " + file.getOriginalFilename() + "!");

        return "redirect:/";
    }
}
Let’s break it down line by line:
@Controllerannotation is also a specialization of@Componentannotation. It makes a class accept the HTTP request and respond accordingly. It also takes care of the various conversion of request payload to an internal data structure.- Next we
@AutowiredtheFileServicebean so that we can use itsuploadFilemethod. - Then we have a simple
GetMappingat/which will simply return Stringupload. Being a controller class Spring will search forupload.htmland serve it to the browser. - Next, we have a
PostMappingof/uploadFile, which have aRequestParamofMultipartFilewhich is an object that has our file and its metadata details. - We then used the
FileServiceuploadFilemethod to upload the file.RedirectAttributesis a specialization of SpringModelinterface that is used to select attributes for a redirect scenario. - If the above operation is successful, we set the success message in
redirectAttributesand redirect to the same page.
Now let’s make another Thymeleaf template,upload.html:
<!DOCTYPE html>
<html lang="en" xmlns:th="http://www.thymeleaf.org">
<head>
    <meta charset="UTF-8">
    <title>Title</title>
</head>
<body>

    <h1>Spring Boot File Upload Example</h1>
    <hr/>
    <h4>Upload Single File:</h4>
    <form method="POST" th:action="@{/uploadFile}" enctype="multipart/form-data">
        <input type="file" name="file"/> <br/><br/>
        <button type="submit">Submit</button>
    </form>
    <hr/>
    <div th:if="${message}">
        <h2 th:text="${message}"/>
    </div>
</body>
</html>
Above, we have a simple form that maps to the /uploadFile URL. Notice that it’s enctype is multipart/form-data and input type as a file. At the bottom, it has a message div to display the success message.
Our main class is a typical Spring Boot main class:
@SpringBootApplication
public class SpringBootUploadFileApplication {

	public static void main(String[] args) {
		SpringApplication.run(SpringBootUploadFileApplication.class, args);
	}

}
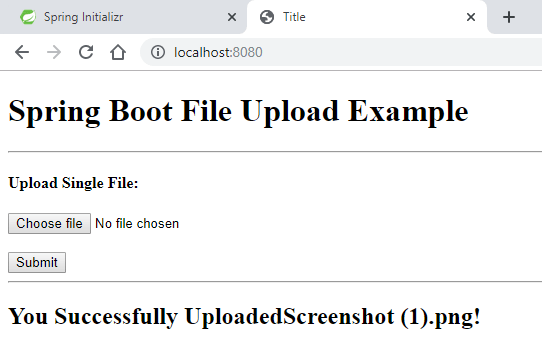
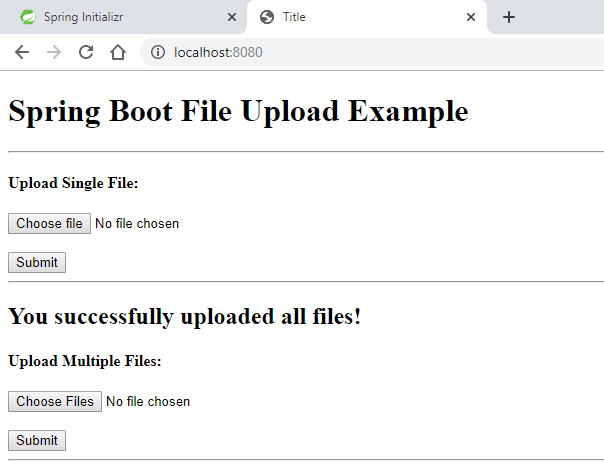
Let’s run our application and navigate to http://localhost:8080:
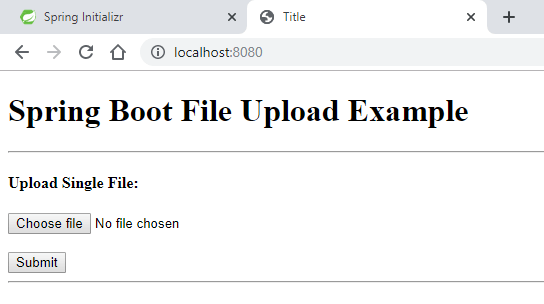
Choose a file and upload, you should see something like:
Uploading Multiple Files
Similarly, we can write code for uploading multiple files. Add the following mapping in FileController.java:
@PostMapping("/uploadFiles")
public String uploadFiles(@RequestParam("files") MultipartFile[] files, RedirectAttributes redirectAttributes) {

    Arrays.asList(files)
        .stream()
        .forEach(file -> fileService.uploadFile(file));

    redirectAttributes.addFlashAttribute("message",
        "You successfully uploaded all files!");

    return "redirect:/";
}
As you can see, the /uploadFiles mapping is similar to the previous one, except it has a MultipartFile[] as an argument. We used the Java 8 Stream API to upload each file in the array.
Just like before, if the above operation is successful, we set the success message in redirectAttributes and redirect to the same page.
Now, we just need to update the code in the template upload.html to handle this:
<h4>Upload Multiple Files:</h4>
<form method="POST" th:action="@{/uploadFiles}" enctype="multipart/form-data">
  <input type="file" name="files" multiple/> <br/><br/>
  <button type="submit">Submit</button>
</form>

<hr/>
The only thing different from the previous HTML is that the mapping is to the /uploadFiles endpoint and the input has a multiple attribute, allowing you to select more than one file. Also since the @RequestParam is files, we have to use the same name in HTML.
Let’s run our application again and navigate to http://localhost:8080:
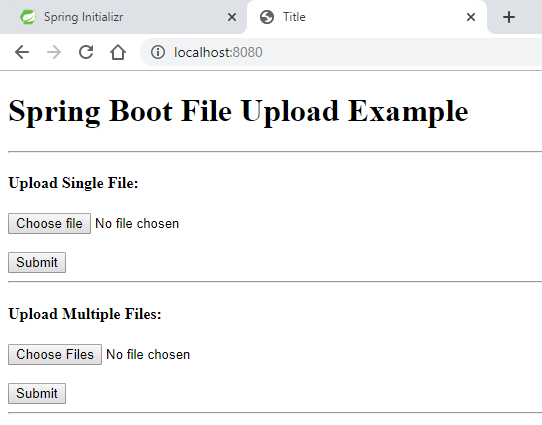
Choosing the second option now allows us to select more than one file from our file system and upload them all.
Limiting Filesize
You can tune the file upload limits by using spring.servlet.multipart.max-file-size and spring.servlet.multipart.max-request-size in application.properties:
spring.servlet.multipart.max-file-size = 5MB
spring.servlet.multipart.max-request-size = 5MB
You can set the limits in KB, MB, GB, etc.
The default value for spring.servlet.multipart.max-file-size is 1MB and the default for spring.servlet.multipart.max-request-size is 10MB. Increasing the limit for max-file-size is probably a good idea since the default is very low, but be careful not to set it too high, which could overload your server.
Conclusion
In this article, we’ve covered how to upload a single file and multiple files in a Spring Boot application. We used Spring’s MultipartFile interface to capture files in the HTTP request and Thymeleaf templates as our rendering engine.
Github
As always, the code for the examples used in this article can be found on GitHub.