1. Overview
By default, Spring Boot comes with a banner that shows up as soon as the application starts.
In this article, we’ll learn how to create a custom banner and use it in Spring Boot applications.
Bootstrap you application through SPRING INITIALIZR
Create your Spring-Boot project with the help of Spring Initializr.
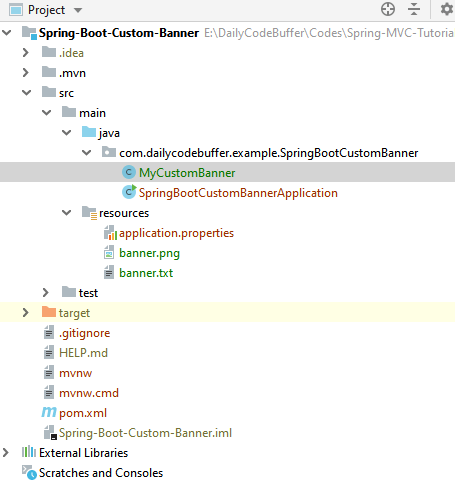
Standard Maven Project Structure
Following is the complete project structure that we will be developing step-by-step.
2. Creating Custom Banner
Before we start, we need to create the custom banner which will be displayed at the time of application start-up time. We can create the custom banner from scratch or use various tools that will do this for us.
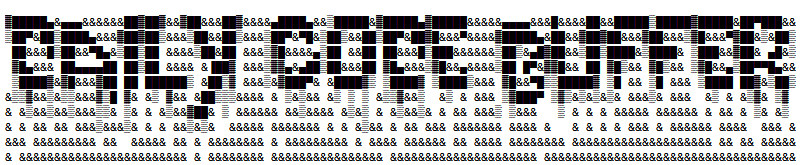
In addition to a text file, you can also add a banner.gif, banner.jpg, or banner.png image file to your classpath or set the spring.banner.image.location property. Images are converted into an ASCII art representation and printed above any text banner.
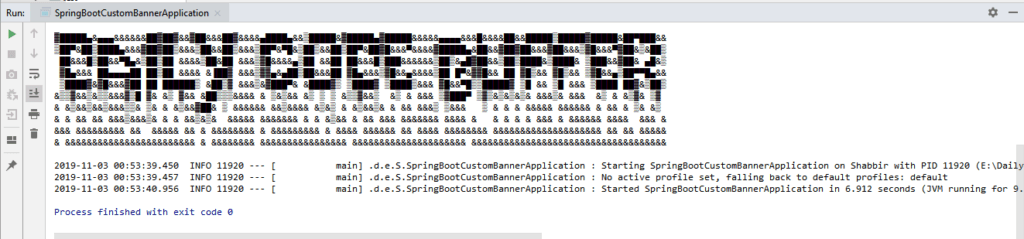
Test it by running the application and the default banner will be replaced with the following.
Configure Banner location in Application Property File
We can configure banner, both text and image in the application property file. In this way, we can choose to load the text and image file from any other location with some other name. Spring Boot provides the following property to configure location or name in the application.properties file.
spring.banner.location=classpath:/path/to/banner/bannername.txt
spring.banner.image.location=classpath:/path/to/banner/bannername.gif
Banner Variables
If you want to display some additional information with a banner on application start-up, you can do some by using banner variables. They can be used as placeholders inside your banner.txt.
| Variable | Description |
|---|---|
${application.version} | The version number of your application, as declared in MANIFEST.MF. For example, Implementation-Version: 1.0 is printed as 1.0. |
${application.formatted-version} | The version number of your application, as declared in MANIFEST.MF and formatted for display (surrounded with brackets and prefixed with v). For example (v1.0). |
${spring-boot.version} | The Spring Boot version that you are using. For example 2.2.0.RELEASE. |
${spring-boot.formatted-version} | The Spring Boot version that you are using, formatted for display (surrounded with brackets and prefixed with v). For example (v2.2.0.RELEASE). |
${Ansi.NAME} (or ${AnsiColor.NAME}, ${AnsiBackground.NAME}, ${AnsiStyle.NAME}) | Where NAME is the name of an ANSI escape code. See AnsiPropertySource for details. |
${application.title} | The title of your application, as declared in MANIFEST.MF. For example Implementation-Title: MyApp is printed as MyApp. |
The
SpringApplication.setBanner(…)method can be used if you want to generate a banner programmatically. Use theorg.springframework.boot.Bannerinterface and implement your ownprintBanner()method.
The printed banner is registered as a singleton bean under the following name: springBootBanner.
Turn – Off the banner using the Properties file
spring.main.banner-mode = off
Turn – Off the banner programmatically
public static void main(String[] args) {
    SpringApplication app = new SpringApplication(SpringBootCustomBannerApplication.class);
    app.setBannerMode(Banner.Mode.OFF);
    app.run(args);
}
3. Generating banner programmatically
Yes, you can also change the banner programmatically. For this spring boot provides org.springframework.boot.Banner interface. Override printBanner() method and provide your own implementation. Let us create “MyCustomBanner.java” inside “com.dailycodebuffer.example.SpringBootCustomBanner” package.
public class MyCustomBanner implements Banner {

    @Override
    public void printBanner(Environment environment, Class<?> sourceClass, PrintStream out) {
        out.println("================================================");
        out.println("      ##  I LOVE DAILY CODE BUFFER  ##        ");
        out.println("================================================");
    }
}
Now you have to register the above banner class “MyCustomBanner” with SpringApplication. For this use the SpringApplication.setBanner(…) method as below.
@SpringBootApplication
public class SpringBootCustomBannerApplication {

	public static void main(String[] args) {
		SpringApplication application = new SpringApplication(SpringBootCustomBannerApplication.class);
		application.setBanner(new MyCustomBanner());
		application.run(args);
	}

}
Different other modes are available such as Banner.Mode.CONSOLE to print the banner on the console, Banner.Mode.LOG to print on a log, etc.
4. Conclusion
In this article, we saw different ways to use our own custom banners in place of default banners. I hope you have enjoyed this. If you loved our work, kindly subscribe our blog and in case of any problem let us know in the comment section below


Pingback: Spring Boot Template Engines - Daily Code Buffer